| |

|
|
Prolific Publishing, Inc.
All sales are final. Please download and try our software products before you purchase them.
Thank you for visiting our online store.
This is the only place to purchase the original Marine Aquarium and LifeGlobe Products.
| Featured products |
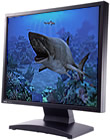
Marine Aquarium 3.3 for Windows
You've seen aquarium programs before, but the realism of Marine Aquarium has led to over 20 million downloads, as well as regular appearances in movies, and on television.
This stunning update to Marine Aquarium adds support for High Definition widescreen 3D displays, an optional Clock /...
Our price: $14.95 ( Digital download only )
|
See details
|
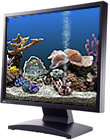
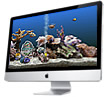
Marine Aquarium 3.2 for Mac OS X
You've seen aquarium programs before, but the realism of Marine Aquarium has led to over 20 million downloads, as well as regular appearances in movies, and on television.
This stunning update to Marine Aquarium adds support for High Definition widescreen 3D displays, an optional Clock /...
Our price: $14.95 ( Digital download only )
|
See details
|
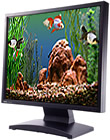
Goldfish Aquarium 2.0 - Windows
First bred for the emperors of China, watching these gentle gems is like watching an underwater ballet. These fish are not animated like a movie, they are completely autonomous creatures.
Our price: $19.95 ( Digital download only )
|
See details
|
|
|
|
|